Showing posts with label chocolate. Show all posts

Monday, December 13, 2010

Chocolate Espresso Mini Cupcakes with Mocha Buttercream


These were made for my mom's Marketing class. She's been working on a group project of developing a marketing plan for my imaginary cupcake business (which will not come to fruition until I at least get some business classes and cake decorating classes under my belt, so don't get too excited), and asked for something to sample during their presentation. So, I made mini chocolate espresso cupcakes with mocha buttercream, and topped them all with a chocolate-covered espresso bean. They were a hit.

I got both the cake and frosting recipes from Allrecipes.com.

My KitchenAid mixing up the batter like a champ


This recipe makes a TON of minis. Filled up two pie carriers and my two-dozen mini cupcake carrier, with a few to spare for David to take to work.

Chocolate Mocha Cake I Recipe (from Allrecipes)

Ingredients

  • 2 cups all-purpose flour
  • 2 cups white sugar
  • 2/3 cup unsweetened cocoa powder
  • 1/2 cup vegetable oil
  • 2 eggs
  • 1 cup buttermilk
  • 2 teaspoons baking soda
  • 1/2 teaspoon salt
  • 1 teaspoon baking powder
  • 1 tablespoon instant coffee powder
  • 1 cup hot water

Directions

  1. Preheat oven to 350 degrees F (175 degrees C). Grease two 9 inch round cake pans. (I of course used mini cupcake pans and liners, adjust the baking time to about 10 minutes per pan)
  2. Measure flour, sugar, cocoa, oil, eggs, buttermilk, baking powder, soda, and salt into a mixing bowl. Dissolve instant coffee in hot water, and add to mixing bowl. Beat at medium speed for 2 minutes until smooth; batter will be thin. Pour into prepared pans.
  3. Bake for 30 to 35 minutes, or until an inserted wooden pick comes out clean. Cool in pans for 10 minutes, and then turn out onto racks to cool completely.


Nutritional Information 

Amount Per Serving  Calories: 318 | Total Fat: 11g | Cholesterol: 36mg

Coffee Butter Frosting (from Allrecipes)

Ingredients

  • 1 1/2 cups confectioners' sugar
  • 1 tablespoon unsweetened cocoa powder
  • 1/3 cup butter or margarine, softened
  • 1 tablespoon strong brewed coffee (I used two tablespoons for stronger flavor)

Directions

  1. In a small bowl, stir together the confectioners sugar and cocoa powder. In another bowl, beat the butter until creamy, gradually beat in the sugar mixture, being sure to scrape the bottom of the bowl, occasionally. Finally stir in the coffee, and beat until smooth.

Nutritional Information 

Amount Per Serving  Calories: 105 | Total Fat: 5.2g | Cholesterol: 14mg


Tuesday, November 9, 2010

Almond Joy Balls


I made these for David's dad, Martin, at his request. I've made them before, but never blogged about them since I was sticking to just cupcakes at the time. These are so easy to make, and taste just like the real thing!

Firming up in the fridge before coating in chocolate.

Packed up and ready to go!

Almond Joy Balls (adapted from chocolate-candy-mall.com)

Ingredients:
5 oz sweetened condensed milk
1 t vanilla
2 C powdered sugar
14 oz shredded or flaked coconut
24 oz semisweet chips
1 cup whole dry roasted almonds

Directions:

  1. Blend the condensed milk and the vanilla. Add the powdered sugar a little at a time until smooth. 
  2. Stir in the coconut. The mixture should be firm. 
  3. Roll the mixture into ping-pong-sized balls, either topping each with an almond or inserting an almond into the center. Refrigerate until firm.
  4. Melt the chocolate chips in the microwave (my preferred method) or in a double boiler. If using the microwave, be sure to use a glass microwave-safe bowl and check every 30 seconds so you don't burn the chocolate. You cannot save burnt chocolate.  
  5. Remove the coconut mixture from the refrigerator. 
  6. Set each coconut ball onto a fork and dip it into the chocolate. Tap the fork against the side of the pan or bowl to remove any excess chocolate. Place on waxed paper lined tray or wire rack above wax paper to set. Optional: top with sprinkling of chocolate jimmies.

Saturday, October 2, 2010

Banana Nut Chocolate Chip Mini Bundt Cakes


Sorry it's taken me so long to post these! I made these mini bundt cakes a couple of weeks ago to use up some overripe bananas I had. They've got a Pralinutta (same as Nutella but cheaper) "ganache" (really just warmed up Pralinutta with some water added) on top! The cakes came out so moist and delicious.


One of the best things about this recipe is that it's very versatile. You can add so many different things to it and have it still come out delicious. And, it doesn't have milk! I didn't have milk on hand at the time, so I was very excited to find this recipe.

Banana Nut Chocolate Chip Mini Bundt Cakes (adapted from Serious Eats)

  • 1 1/2 c. all-purpose flour
  • 1 tsp. baking soda
  • 1/4 tsp. salt
  • 1 stick (4 oz) unsalted butter (I used I Can't Believe Its Not Butter)
  • 1 c. sugar
  • 1 tsp. vanilla
  • 1 large egg
  • 2 very ripe bananas, mashed (about 3/4 cup)
  • 1/2 c. sour cream or plain yogurt (I used Strawberry Banana Yoplait because it's what I had on hand)
  • 3 oz chopped chocolate (I of course used half a bag of semi-sweet chocolate chips)
Preheat the oven to 350 degrees Fahrenheit. Grease mini bundt cake tin with baking spray (I use Crisco Baking Spray). Beat butter with mixer until creamy. Add the sugar and beat at medium speed until pale and fluffy. Beat in the vanilla, then the egg, beating for about 1 minute. Reduce the mixer speed to low and mix in the banana mash. Finally, mix in half the dry ingredients (don't be surprised if the batter curdles), all the sour cream or yogurt, and then the rest of the flour mixture. Stir in the chocolate by hand. Divide the batter evenly among the muffin cups. Bake the little cakes for about 28 to 32 minutes (my oven cooks faster then this, I just always take them out when I can smell them). Transfer the tin to a cooling rack for around 3 minutes, then gently turn them out of the tin (I place a clean dish towel on top of the tin, then flip quickly and carefully onto the table). Cool to room temperature on a rack. The cakes will keep at room temperature if stored tightly for 2 to 3 days, or you can freeze them for up to 2 months.


Happy Baking!

Saturday, August 14, 2010

Chocolate Chunk Cupcakes with Vanilla Bean Buttercream


Long time no post, eh? Well, we're finally settled into our new place, and I've finally had an opportunity to make cupcakes! My cousin Lauren and aunt Cathy whom I haven't seen in about 4 years came down to visit our family yesterday! So, of course, I needed pull out all the stops and whip up some awesome cupcakes.

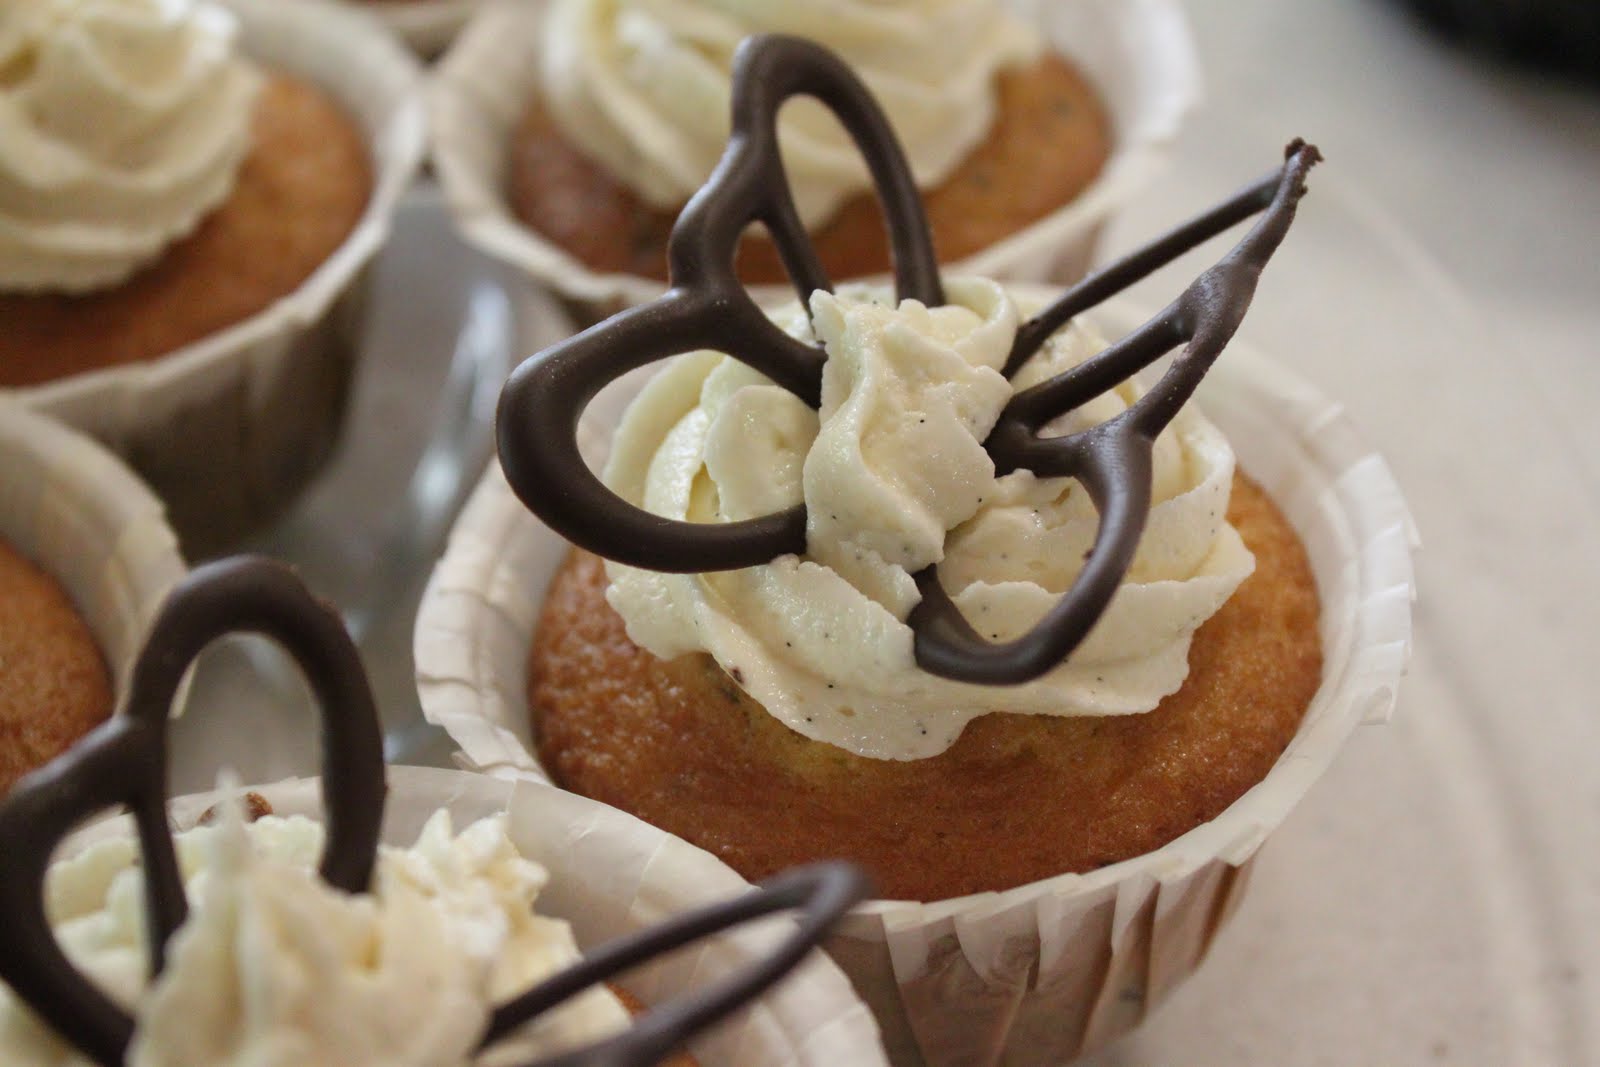
These cupcakes are yellow cake with dark chocolate chunks mixed in, with Mexican vanilla bean buttercream and a dark chocolate butterfly on top. I got the recipe for the cupcakes and frosting from Brownies For Dinner, and the recipes for both will be posted at the end of this entry with my additions listed.

I started by making the chocolate butterflies from melted Ghirardelli 60% dark chocolate on Wednesday. I'm not sure I tempered the chocolate correctly, because they never really hardened like they should have, but the fridge/freezer was a quick fix for it.


I drew up the pattern for the wings, drew over it with thick black Sharpie, and just laid it underneath the parchment paper and piped chocolate over it with a squeeze bottle.

I baked the cupcakes on Friday, with these cute ruffled liners from Wilton that I found at Hobby Lobby.


Then, I packed up my frosting, the butterfly wings, and the cupcakes, and headed to my Gram's. I didn't assemble them beforehand because I wasn't sure the butterfly wings would hold up, and it's much easier to travel with unfrosted cupcakes. I assembled them at my Gram's, and they were a total hit!


Chocolate Chunk Cupcakes Recipe
  • 1 box yellow cake mix (I used Duncan Hines, since I had it in my pantry)
  • 4 eggs (I always use brown, cage-free eggs)
  • 3/4 cup oil (I used Smart Balance, which is a blend of canola, soy, and olive oil)
  • 1/2 cup water
  • 8 ounces of good dark chocolate, chopped (I used Ghirardelli 60% dark)


1.Preheat oven to 350 degrees.  Line 24 muffin cups with paper liners. 
2. In a large bowl, combine the cake mix, oil and water.  Add eggs one at a time.  Mix well (about 2-3 minutes).
3. Stir in chocolate. 
4. Divide batter evenly among prepared muffin cups.
5. Bake for about 15-20 minutes (I think I baked mine for 12, but I only bake one pan at a time. Just take them out when you can really smell them and a knife or toothpick inserted into the center comes out clean).  Let them cool completely on a rack before frosting.

Vanilla Bean Buttercream
  • 1 cup unsalted butter, softened (I actually used I Can't Believe It's Not Butter, in the stick form)
  • 2 – 2 1/2 cups powdered sugar, sifted (I used 3 cups)
  • 1/2 vanilla bean (I ended up using two whole beans. The flavor wasn't strong enough for me and there wasn't a high enough concentration of vanilla caviar visible in the frosting with just half)
  • 1/2 teaspoon vanilla extract
  • 1 tablespoon milk (I probably only used about half a teaspoon. I like my frosting stiff for piping.)


1. Beat the butter until it gets light and fluffy.  Gradually add powdered sugar.  Add the milk and beat for 2-3 minutes.
2. Split the vanilla bean half in lengthwise and scrape out all of the seeds.  Add the seeds and extract to the bowl.  Beat on high until combined and fluffy.


Sunday, June 27, 2010

Chocolate Hazelnut Nutella Mini Bundt Cakes


These were made for my friend Becca's 21st birthday party. They're chocolate hazelnut Nutella mini bundt cakes with Nutella, tiramisu mascarpone cheese, fresh raspberries, and homemade raspberry sauce on top. I got the idea from Passionate About Baking, but tweaked it a bit to suit my needs.


For the cakes, rather than follow Deeba's recipe, I decided to use a box of chocolate cake mix that I had in the pantry. I added to it some chopped toasted hazelnuts, a cup of strong espresso, some chocolate chips, and Nutella. 


To make the raspberry sauce for the tops of the cupcakes, I simply heated a jar of sugar free raspberry jam over the stove. You can add in whatever you like to it at this point, so I added a teaspoon each of rum extract and vanilla extract. I also added about 2 tablespoons of orange liqueur (I used Paula's Texas Orange). Then you strain the seed out of the jam, and you're left with a fabulous sauce that is also great on ice cream!


Then, I just assembled the cakes by putting Nutella in the center of the cakes and somewhat on the top, then a dollop of tiramisu mascarpone (it's infused with espresso, making it perfect for tiramisu), then a fresh raspberry, and a drizzle of sauce!


Chocolate Hazelnut Nutella Cake
  • 1 box of chocolate cake mix
  • 1 cup of toasted hazelnuts, coarsely chopped
  • 1 cup of strongly brewed coffee (I used instant espresso granules)
  • 1 cup of semi-sweet chocolate chips
  • 2 small jars of Nutella
  • 1 tub of tiramisu mascarpone cheese
  • fresh raspberries
  • raspberry sauce (see recipe below)
Prepare chocolate cake mix according to instructions, substituting the coffee for part of the water. Stir in hazelnuts, chocolate chips, and one jar of Nutella. Bake according to instructions on box. Garnish with Nutella, mascarpone, raspberries, and sauce. 

Raspberry Sauce
  • 1 small jar of raspberry jam (I used sugar free just because)
  • 1 tsp vanilla
  • 1 tsp imitation rum extract
  • 2 tbsp orange liqueur (I used Paula's Texas Orange)
Heat jam in saucepan over medium low heat until viscous. Stir in vanilla, rum extract, and liqueur. Strain with mesh strainer to remove seeds and pulp. Refrigerate until needed. 


Unfortunately, this may be my last post for a little while. Why? Because we're moving!!!!! Yes, we're finally moving out of this duplex and into a house! So no cupcaking for at least a month since we need to save up for deposits and whatnot, and also we'll be settling into our new place. Updates will come as soon as they're available.

P.S. 22 followers? Really??? You guys are AWESOME!!!


Saturday, June 26, 2010

Memorial Day Slider Cupcakes (second try)


I made these for a Memorial Day potluck we had at work that was BBQ-themed. Unfortunately, I only figured out toward the end of my baking that in order to have a perfect dome at the top of the cupcake instead of having them come out like little hats, you should only spray the bottom of each cup of the muffin tin, not the sides. When you spray the sides, the spray over cooks the edges/top of the cupcake. They still tasted great, though. Just used box mixes and my standby buttercream recipe.  

Saturday, May 22, 2010

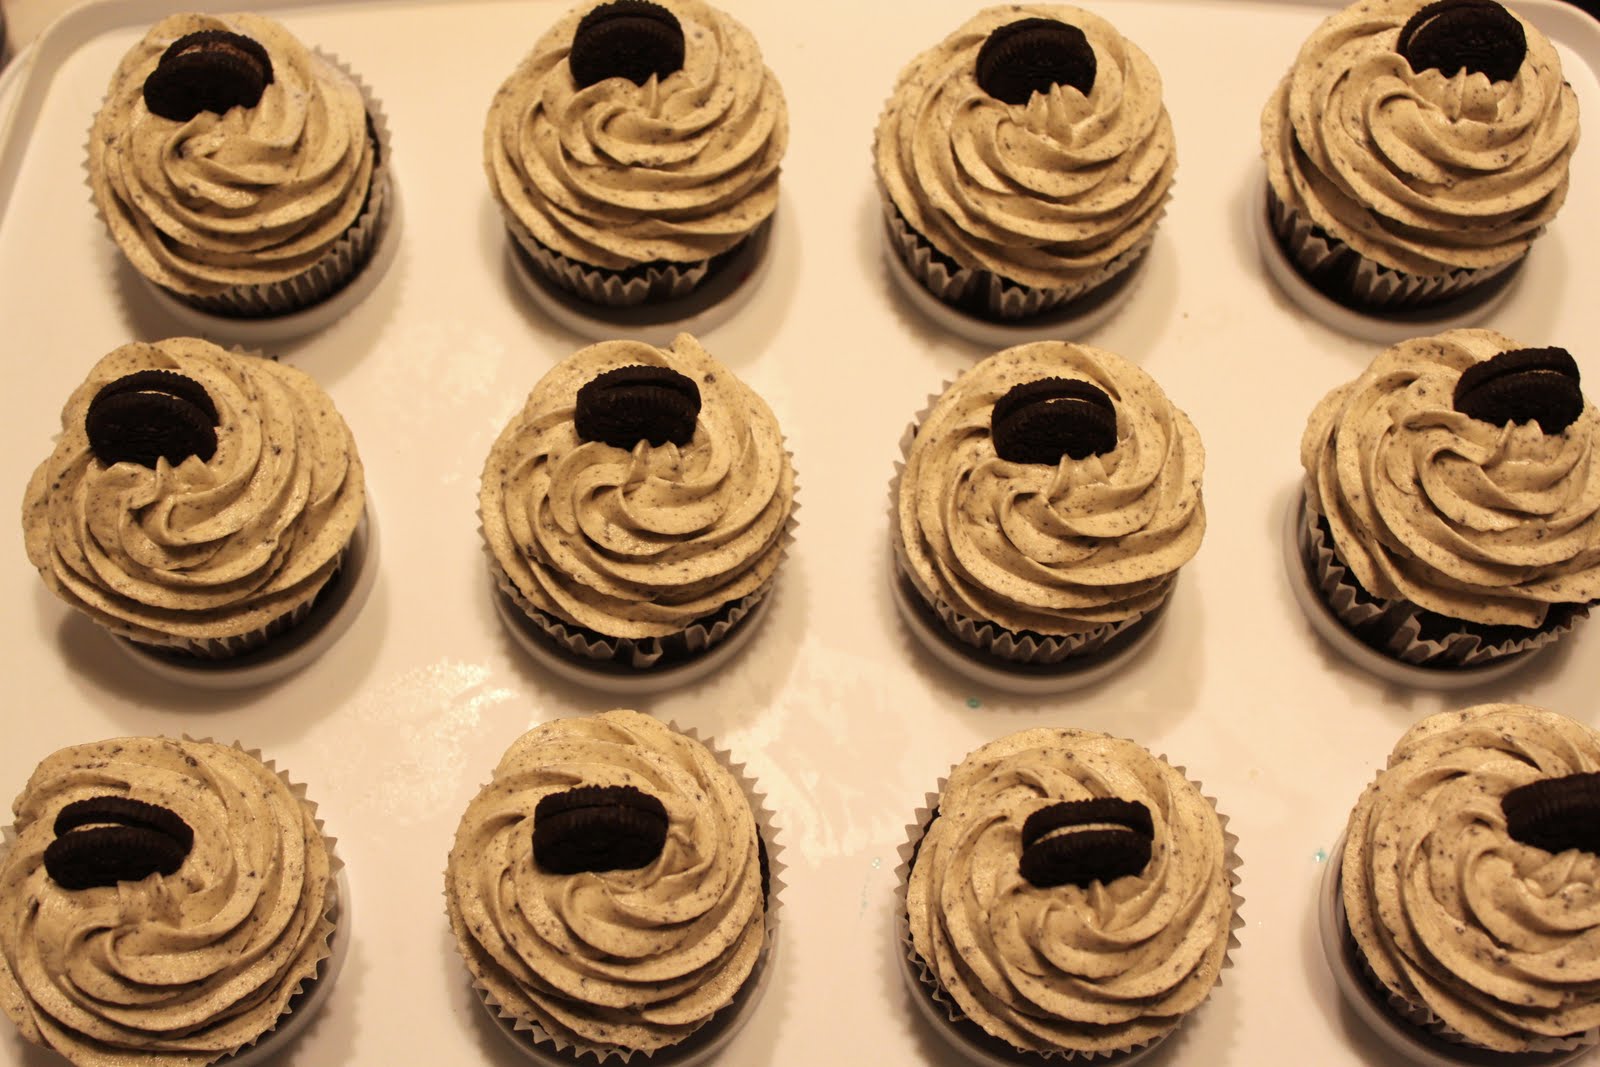
Vegan Cookies 'n' Cream Cupcakes!


Oh yes, they tasted as good as they looked. =]

These were made for our nephew Jaedyn's adoption party. He's got severe dairy allergies, so everything I make for him needs to be vegan/dairy-free. You'd think this would limit my options as far as baking goes, but there are so many awesome recipes out there! This one came from Vegan Cupcakes Take Over the World by Isa Chandra Moskowitz and Terry Hope Romero, but I found it online at Chow.com.

Jaedyn LOVED them, especially the frosting. He was eyeballing them all through dinner. Here's some more pictures.


Jaedyn chowing down on the breakfast of champions the next morning. =]

Vegan Cookies 'n' Cream Cupcakes
  • 1 c. soy milk (I used vanilla Silk)
  • 1 tsp. apple cider vinegar
  • 3/4 c. granulated sugar
  • 1/3 c. canola oil
  • 1 tsp. vanilla extract
  • 1/2 tsp. almond extract, chocolate extract, or more vanilla extract
  • 1 c. all-purpose flour
  • 1/3 c. cocoa powder, Dutch-processed or regular
  • 3/4 tsp. baking soda
  • 1/2 tsp. baking powder
  • 1/4 tsp. salt
  • 1 c. coarsely chopped chocolate cream-filled sandwich cookies
  • Vegan Fluffy Buttercream Frosting
Preheat oven to 350°F and line a muffin pan with paper or foil liners. Whisk together the soy milk and vinegar in a large bowl, and set aside for a few minutes to curdle. Add the sugar, oil, vanilla extract, and other extract, if using, to the soy milk mixture and beat until foamy. In a separate bowl, sift together the flour, cocoa powder, baking soda, baking powder, and salt. Add in two batches to wet ingredients and beat until no large lumps remain (a few tiny lumps are OK). Mix in the sandwich cookies. Pour into liners, filling 3/4 of the way. Bake 18 to 20 minutes, until a toothpick inserted into the center comes out clean. Transfer to a cooling rack and let cool completely.


Vegan Fluffy Buttercream Frosting
  • 1/2 c. nonhydrogenated shortening (I just used butter-flavored Crisco since I wasn't worried about the vegan aspect)
  • 1/2 c. nonhydrogenated margarine (I used Willow Run soy margarine)
  • 3 1/2 c. powdered sugar
  • 1 1/2 tsp. vanilla extract
  • 1/4 c. plain soy milk or soy creamer (I used vanilla Silk again since it's what I had)
Beat the shortening and margarine together until well-combined and fluffy. Add the sugar and beat for about 3 more minutes. Add the vanilla and the soy milk, and beat for another 5 to 7 minutes until light and fluffy. Just fold in chocolate sandwich cookie crumbs to make it match the cupcakes.

Related Posts Plugin for WordPress, Blogger...